As I have discussed previously, we can use cryptography over the amateur radio service, as long as we disable encryption. I have shown how to do this with SSH. Now, let’s see how to do this with HTTPS.
Modifying a Web browser, or even just a Web server, is an involved process, so we’ll start small, with the openssl command-line tool. On with crypto-crimes! No, not that crypto.
OpenSSL Server
The openssl command-line tool can be used like netcat to open a TLS session. To start a server, instead of:
$ nc -nlvp 4433
Listening on 0.0.0.0 4433
We’ll do:
$ openssl s_server
Could not open file or uri for loading server certificate private key from server.pem
4067D713C67F0000:error:16000069:STORE routines:ossl_store_get0_loader_int:unregistered scheme:../crypto/store/store_register.c:237:scheme=file
4067D713C67F0000:error:80000002:system library:file_open:No such file or directory:../providers/implementations/storemgmt/file_store.c:267:calling stat(server.pem)
Uh oh.
Right. We’re doing TLS, so we’ll need some cryptographic key.
If you are on a Debian-based Linux distribution (e.g. Ubuntu), you can always use the “snakeoil” key:
$ sudo openssl s_server -key /etc/ssl/private/ssl-cert-snakeoil.key -cert /etc/ssl/certs/ssl-cert-snakeoil.pem -www
Using default temp DH parameters
ACCEPT
Note that we need to run the command as root to be able to read the private key. The -www option starts a basic Web server behind the TLS server, so you can test the setup by browsing to https://127.0.0.1:4433/. It will serve a Web page giving you the command-line you use as well as debugging information about the TLS connection.
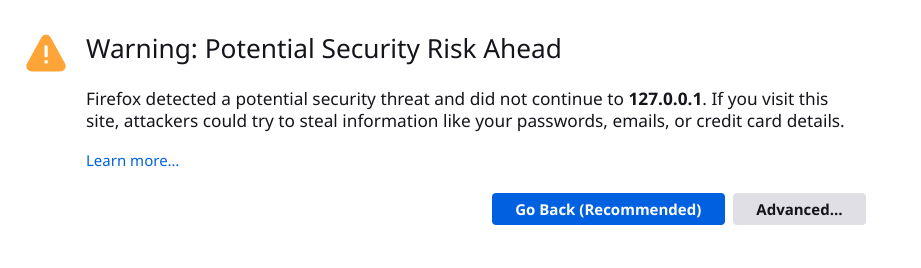
Note: your Web browser does not know the emitter of the cryptographic key, so it will show a scary warning as shown below. This is expected, so you can just click on “Advanced…” and then on “Accept the Risk and Continue”.

We’ll want to create our own cryptographic key instead of using the “snakeoil” one. Also, we’ll need a corresponding “.pem” file, or certificate, that will give a name (“CN” for “Common Name”) to this key. This is done with the following commands.
$ openssl genrsa -out server.key 4096
$ openssl req -new -x509 -key server.key -out server.pem -subj "/CN=localhost"
Once this is done, we can start a TLS server with:
$ openssl s_server -key server.key -cert server.pem -wwwAs with the “snakeoil” certificate, you can check the connection from your Web browser:

OpenSSL Client
We’ve seen nc -nlvp 4433. Now, let’s see nc -v 127.0.0.1 4433:
openssl s_clientBy default, it will try to connect to port 4433 on the local loopback. If you have a running s_server without the -www option in another terminal, you will be able to send messages from one another.
Note: if you do not remove the -www option from the s_server command, you will not see your inputs as you might expect, since they will be either ignored (server side) or sent as part of the HTTP protocol (client side).
Note: input is sent line-by-line, so you won’t see your message in the other terminal until you hit Return.
If you want to feel like a leet-h4x0r, you can use the s_client command to connect to any public TLS server. For instance, instead of clicking on the link https://perdu.com, you may run the following command
$ openssl s_client -connect perdu.com:443Then, type the following and hit Return twice (you need to send a blank line).
GET / HTTP/1.1
Host: perdu.com
You should see the HTML for the Web page being printed in your terminal:
<html><head><title>Vous Etes Perdu ?</title></head><body><h1>Perdu sur l'Internet ?</h1><h2>Pas de panique, on va vous aider</h2><strong><pre> * <----- vous êtes ici</pre></strong></body></html>Disabling Encryption
What we’ve done so far is basically the equivalent of the code shown below, except everything was encrypted.
$ nc -nvlp 4433
$ nc -v 127.0.0.1 4433
$ nc perdu.com 80
GET / HTTP/1.1
Host: perdu.com
To convince ourselves of it, we can use Wireshark. Once it’s started, select the any interface, type tcp.port==4433 as the filter, and hit Return.

Oh! And go play with the s_server and s_client command like we’ve seen above. You should see stuff like this:

This shows network packets being exchanged on the TCP port 4433 (the one used by default by s_server and s_client). The one I have selected corresponds to the transmission of “Hello World” from the client to the server. You can see it. It’s right here in the “Encrypted Application Data”. Okay, you cannot really see it, since it’s encrypted, by take my word for it.
Now that we have done all of that, we can ask ourselves the fun question: how can we make all of this pointless?
Let’s disable this all “confidentiality-preserving” technobabble “encryption” stuff.
First, let’s ask openssl to tell it what encryption modes it supports. On my computer, I get:
$ openssl ciphers -s -v
TLS_AES_256_GCM_SHA384 TLSv1.3 Kx=any Au=any Enc=AESGCM(256) Mac=AEAD
TLS_CHACHA20_POLY1305_SHA256 TLSv1.3 Kx=any Au=any Enc=CHACHA20/POLY1305(256) Mac=AEAD
TLS_AES_128_GCM_SHA256 TLSv1.3 Kx=any Au=any Enc=AESGCM(128) Mac=AEAD
ECDHE-ECDSA-AES256-GCM-SHA384 TLSv1.2 Kx=ECDH Au=ECDSA Enc=AESGCM(256) Mac=AEAD
ECDHE-RSA-AES256-GCM-SHA384 TLSv1.2 Kx=ECDH Au=RSA Enc=AESGCM(256) Mac=AEAD
DHE-RSA-AES256-GCM-SHA384 TLSv1.2 Kx=DH Au=RSA Enc=AESGCM(256) Mac=AEAD
ECDHE-ECDSA-CHACHA20-POLY1305 TLSv1.2 Kx=ECDH Au=ECDSA Enc=CHACHA20/POLY1305(256) Mac=AEAD
ECDHE-RSA-CHACHA20-POLY1305 TLSv1.2 Kx=ECDH Au=RSA Enc=CHACHA20/POLY1305(256) Mac=AEAD
DHE-RSA-CHACHA20-POLY1305 TLSv1.2 Kx=DH Au=RSA Enc=CHACHA20/POLY1305(256) Mac=AEAD
ECDHE-ECDSA-AES128-GCM-SHA256 TLSv1.2 Kx=ECDH Au=ECDSA Enc=AESGCM(128) Mac=AEAD
ECDHE-RSA-AES128-GCM-SHA256 TLSv1.2 Kx=ECDH Au=RSA Enc=AESGCM(128) Mac=AEAD
DHE-RSA-AES128-GCM-SHA256 TLSv1.2 Kx=DH Au=RSA Enc=AESGCM(128) Mac=AEAD
ECDHE-ECDSA-AES256-SHA384 TLSv1.2 Kx=ECDH Au=ECDSA Enc=AES(256) Mac=SHA384
ECDHE-RSA-AES256-SHA384 TLSv1.2 Kx=ECDH Au=RSA Enc=AES(256) Mac=SHA384
DHE-RSA-AES256-SHA256 TLSv1.2 Kx=DH Au=RSA Enc=AES(256) Mac=SHA256
ECDHE-ECDSA-AES128-SHA256 TLSv1.2 Kx=ECDH Au=ECDSA Enc=AES(128) Mac=SHA256
ECDHE-RSA-AES128-SHA256 TLSv1.2 Kx=ECDH Au=RSA Enc=AES(128) Mac=SHA256
DHE-RSA-AES128-SHA256 TLSv1.2 Kx=DH Au=RSA Enc=AES(128) Mac=SHA256
ECDHE-ECDSA-AES256-SHA TLSv1 Kx=ECDH Au=ECDSA Enc=AES(256) Mac=SHA1
ECDHE-RSA-AES256-SHA TLSv1 Kx=ECDH Au=RSA Enc=AES(256) Mac=SHA1
DHE-RSA-AES256-SHA SSLv3 Kx=DH Au=RSA Enc=AES(256) Mac=SHA1
ECDHE-ECDSA-AES128-SHA TLSv1 Kx=ECDH Au=ECDSA Enc=AES(128) Mac=SHA1
ECDHE-RSA-AES128-SHA TLSv1 Kx=ECDH Au=RSA Enc=AES(128) Mac=SHA1
DHE-RSA-AES128-SHA SSLv3 Kx=DH Au=RSA Enc=AES(128) Mac=SHA1
AES256-GCM-SHA384 TLSv1.2 Kx=RSA Au=RSA Enc=AESGCM(256) Mac=AEAD
AES128-GCM-SHA256 TLSv1.2 Kx=RSA Au=RSA Enc=AESGCM(128) Mac=AEAD
AES256-SHA256 TLSv1.2 Kx=RSA Au=RSA Enc=AES(256) Mac=SHA256
AES128-SHA256 TLSv1.2 Kx=RSA Au=RSA Enc=AES(128) Mac=SHA256
AES256-SHA SSLv3 Kx=RSA Au=RSA Enc=AES(256) Mac=SHA1
AES128-SHA SSLv3 Kx=RSA Au=RSA Enc=AES(128) Mac=SHA1
Each line is a possible setting (“cipher suite”). What matters is the Enc= part. All of these settings are using some mode of “AES” as encryption. “AES” stands for “Advanced Encryption Standard”. Booooring.
We want no security. None. Zilch. Seclevel zero.
$ openssl ciphers -s -v 'NULL:@SECLEVEL=0'
TLS_AES_256_GCM_SHA384         TLSv1.3 Kx=any      Au=any   Enc=AESGCM(256)            Mac=AEAD
TLS_CHACHA20_POLY1305_SHA256   TLSv1.3 Kx=any      Au=any   Enc=CHACHA20/POLY1305(256) Mac=AEAD
TLS_AES_128_GCM_SHA256         TLSv1.3 Kx=any      Au=any   Enc=AESGCM(128)            Mac=AEAD
ECDHE-ECDSA-NULL-SHA           TLSv1   Kx=ECDH     Au=ECDSA Enc=None                   Mac=SHA1
ECDHE-RSA-NULL-SHA             TLSv1   Kx=ECDH     Au=RSA   Enc=None                   Mac=SHA1
AECDH-NULL-SHA                 TLSv1   Kx=ECDH     Au=None  Enc=None                   Mac=SHA1
NULL-SHA256                    TLSv1.2 Kx=RSA      Au=RSA   Enc=None                   Mac=SHA256
NULL-SHA                       SSLv3   Kx=RSA      Au=RSA   Enc=None                   Mac=SHA1
NULL-MD5                       SSLv3   Kx=RSA      Au=RSA   Enc=None                   Mac=MD5
That’s more like it! We have several options to choose from. You see these Mac=MD5? I know we are trying to give a syncope to every security researcher on the planet, but we still respect ourselves. We’ll use NULL-SHA256. It’s the most secure of the totally insecure cipher suites. Trust me, I have a PhD in cryptography.
Let’s redo the s_server and s_client stuff again, with this cipher suite.
$ openssl s_server -key server.key -cert server.pem -cipher NULL-SHA256:@SECLEVEL=0 -tls1_2
$ openssl s_client -cipher NULL-SHA256:@SECLEVEL=0
Hello World
Note: we need to add the -tls1_2 option; otherwise, OpenSSL will offer TLS 1.3. The cipher suite we have selected is only available for TLS 1.2, and OpenSSL uses a separate option, -ciphersuites (yes, seriously) to configure TLS 1.3 cipher suites. Just add -tls1_2 and don’t think about it too much.

Totally different, you see?
Actually, yes. 48656c6c6f20576f726c64 is the hexadecimal representation of the ASCII encoding of Hello World:

Great! Now, we’re really back at Netcat-level security.
Note: sure, the client is checking the certificate of the server. And we could do all that with a certificate signed by Let’s Encrypt so that it’s not actually fully useless. Oh yeah, right, no, the Web browser is all panicky about the “no security” thing and won’t even let you enable the NULL-SHA256 cipher.

Client Authentication
Okay, okay, wait up. There is one more thing we can do with this, and it might serve some kind of purpose. The browser is checking the authenticity of the server. But what if, like, the server checked the authenticity of the client, man?
Yes, we can do this!
Modern Web browsers are a bit fussy when we disable encryption, so the command-lines in this section will not do so. That way, you can try in your Web browser. But, know that you can combine with the NULL-cipher, and test with the s_client command.
First, let’s tell the server to check the authenticity of the client. We tell it to use server.pem as the authority for client certificates. That is, to be considered valid, client certificates must have been signed by the private key of the server.
$ openssl s_server -key server.key -cert server.pem -verify 1 -CAfile server.pem
verify depth is 1
Using default temp DH parameters
ACCEPT
Then, let’s create a certificate for the client. Since it should be signed by the server’s key, that’s what we do.
$ openssl genrsa -out client.key 4096
$ openssl req -new -key client.key -out client.csr -subj '/CN=John Doe'
$ openssl x509 -req -CA server.pem -CAkey server.key -in client.csr -out client.pem
$ openssl pkcs12 -export -out client.p12 -in client.pem -inkey client.key -passout pass:
Note: the last one is only useful if you want to import the client certificate in a Web browser.
And now, we can use it to authenticate:
$ openssl s_client -cert client.pem -key client.keyOn the server’s side, you should see something like:
$ openssl s_server -key server.key -cert server.pem -verify 1 -CAfile server.pem
verify depth is 1
Using default temp DH parameters
ACCEPT
depth=1 CN = localhost
verify return:1
depth=0 CN = John Doe
verify return:1
…
subject=CN = John Doe
issuer=CN = localhost
Note: alternatively, you can add the -www option to s_server and navigate to https://127.0.0.1:4433/. At the bottom, you’ll see no client certificate available. You can change that by loading the client certificate in your Web browser.
Note: to add the certificate in Firefox, go to:
- “Settings”
- “Privacy & Security”
- “Certificates”
- “View Certificates”
- Your Certificates”
- “Import…”
- Select the client.p12 file
- Give an empty password
Okay, but… Why?
Good question! When we do this, we are allowing the client to authenticate using a secret file on the computer (the private key). This could be used in an actual Web service to let people connect to their account without using a password. That’s a good thing. Since we’re going to disable encryption, we better not have passwords flying on the air!
Conclusion
Now, all of this was a bit academic. But it has allowed us to test out the waters of disabling encryption and using client authentication. It’s also going to be useful when we want to check that a modified Web browser can connect to an s_server instance with NULL encryption, or that we can authenticate to an HTTPS service with a client certificate.
But this will be the topics for other posts!