I had a few hours of “fun” figuring out why my RP2350 could use my ILI9341 display, but not the ST7796 one.
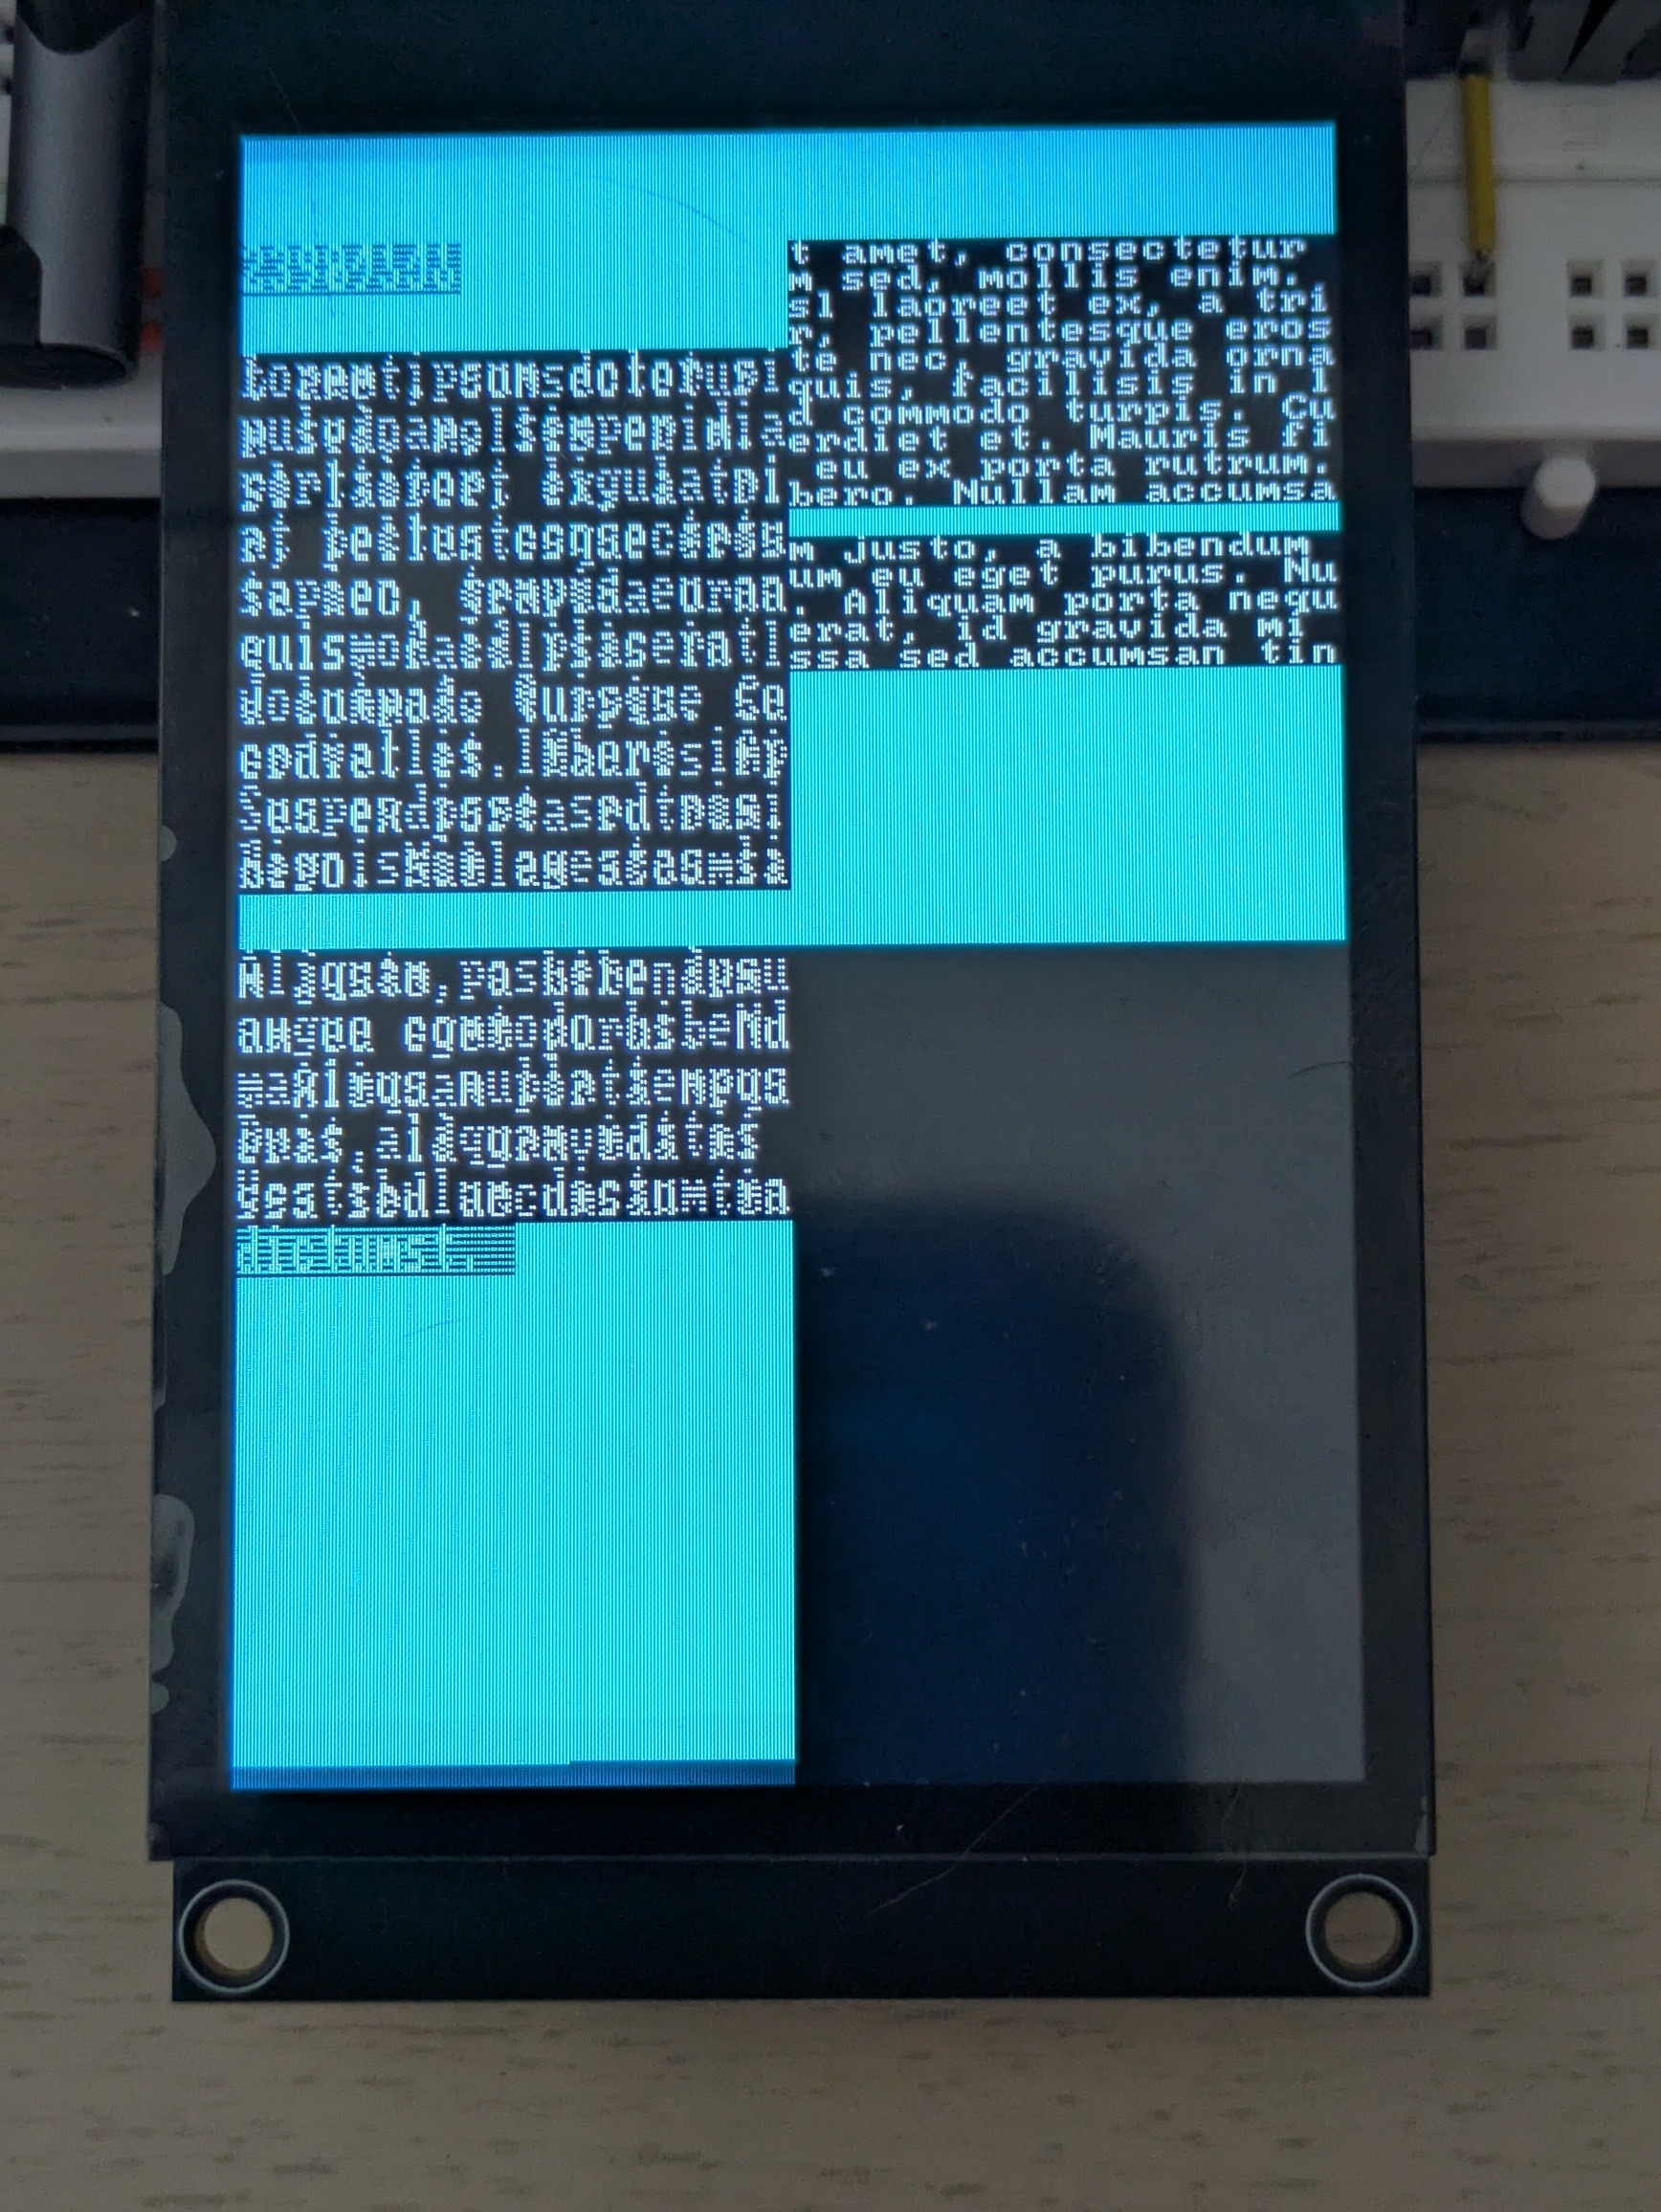
To be more specific, displaying stuff with the first display worked flawlessly, while the ST7796 would display a single frame correctly, and then glitch. Depending on the exact code running, the glitches would include:
- color change (purple instead of cyan)
- every other frame full black
- only every other line drawn, only on the left half of the screen
- complete freeze
Changing completely unrelated code would change the exact glitch, most likely because it slightly changed the timing at which the display code ran, making diagnostic more difficult. On the opposite, just displaying the output of time_us_64() help significantly, since I could immediately tell whether the rendering froze.
After removing all non-display related code and trying many combinations of changes (e.g. DMA vs non-blocking SPI vs blocking SPI, pausing between frames or not, different init sequences, reducing the framebuffer or the baudrate), I finally found the culprit.
The RP2350 is just too damn fast.
I do not want to dump hundreds of lines of code, so I will just show the relevant bits. My original code did this:
static void tft_select(bool selected) {
    gpio_put(TFT_PIN_CS, !selected);
}

static void tft_write_cmd(uint8_t cmd) {
    gpio_put(TFT_PIN_DC, 0);
    tft_select(true);
    spi_write_blocking(TFT_SPI, &cmd, 1);
    tft_select(false);
}

static void tft_write_data(const uint8_t *data, size_t len) {
    if (len == 0) {
        return;
    }
    gpio_put(TFT_PIN_DC, 1);
    tft_select(true);
    spi_write_blocking(TFT_SPI, data, len);
    tft_select(false);
}
There are two pins involved:
- CS tells the device that it should react to SPI at all (when the pin is low)
- DC tells the device that the bits on the SPI bus are Data (1) or Commands (0)
Switching CS on every command was of course overkill, but it looked safer than forgetting to do it somewhere, and then having the device ignore some commands/data or, on the contrary, react to bits that were not destined to it. In any case, it worked.
Well, until it did not, of course.
The first hint was that sending only data (calling CASET/RASET/RAMWR only once, in the initialization function) worked flawlessly. From this, I noticed that lifting calls to tft_select() out of tft_write_* to the initialization and render function also fixed the issue.
With some help of Claude, I identified the relevant part of the datasheet:

The important bit is the last pulse/table row: TCHW. This says that, when CS is disabled (goes electrically high), it should remain in that state for at least 40 ns before being enabled again (becoming electrically low). Failing that, the display chip might miss the falling edge and keep ignoring incoming SPI bits. I usually do not bother checking these timing diagrams, since I let the hardware driver to UART/I²C/SPI, and the manual GPIO manipulations I do I usually relatively slow. However, here, I was often doing effectively:
tft_select(false); // end of previous tft_write_*
gpio_put(TFT_PIN_DC, 0/1);
tft_select(true); // start of next tft_write_*
On most MCUs, this would still take enough time to meet the TCHW requirement. However, the RP2350, clocks at 150 MHz (or 7 ns per cycle). Even combined, these functions take much less than 40 ns. As a result, some parts of the CASET/RAWSET/RAMWR sequence would be ignored, messing up the row addressing, col addressing, sometimes not starting the pixel write at all, and sometimes putting the display chip in a bad state.
The simplest way to confirm this is to add a single line to tft_select():
static void tft_select(bool selected) {
    gpio_put(TFT_PIN_CS, !selected);
    busy_wait_at_least_cycles(6);
}
And, indeed, it made all the glitches disappear. As mentioned earlier, the cleaner fix is to only call tft_select() when needed, but I feel better knowing exactly why the glitches happened, and why not calling tft_select() as often helped.
As to why I did not have the issue with the ILI9341, it just does not have a TCHW:
